Crafting is a fun and inexpensive way to decorate your child’s bedroom. And, it gives you an opportunity to create something together! Here is a list of our favorite kids’ bedroom décor crafts that add that special, final touch in completing their space:
1. String Art
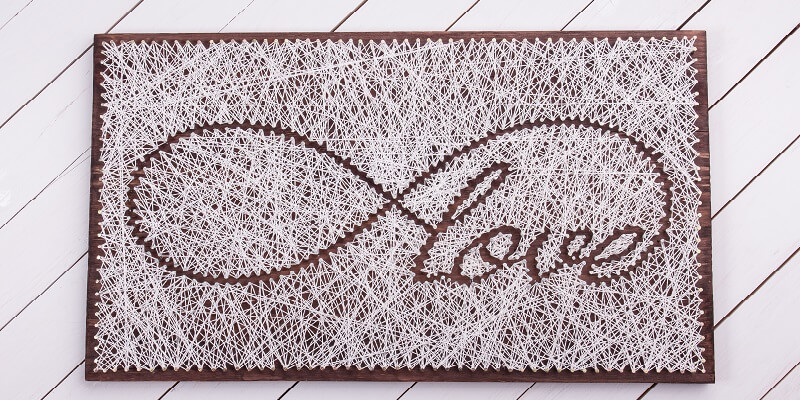
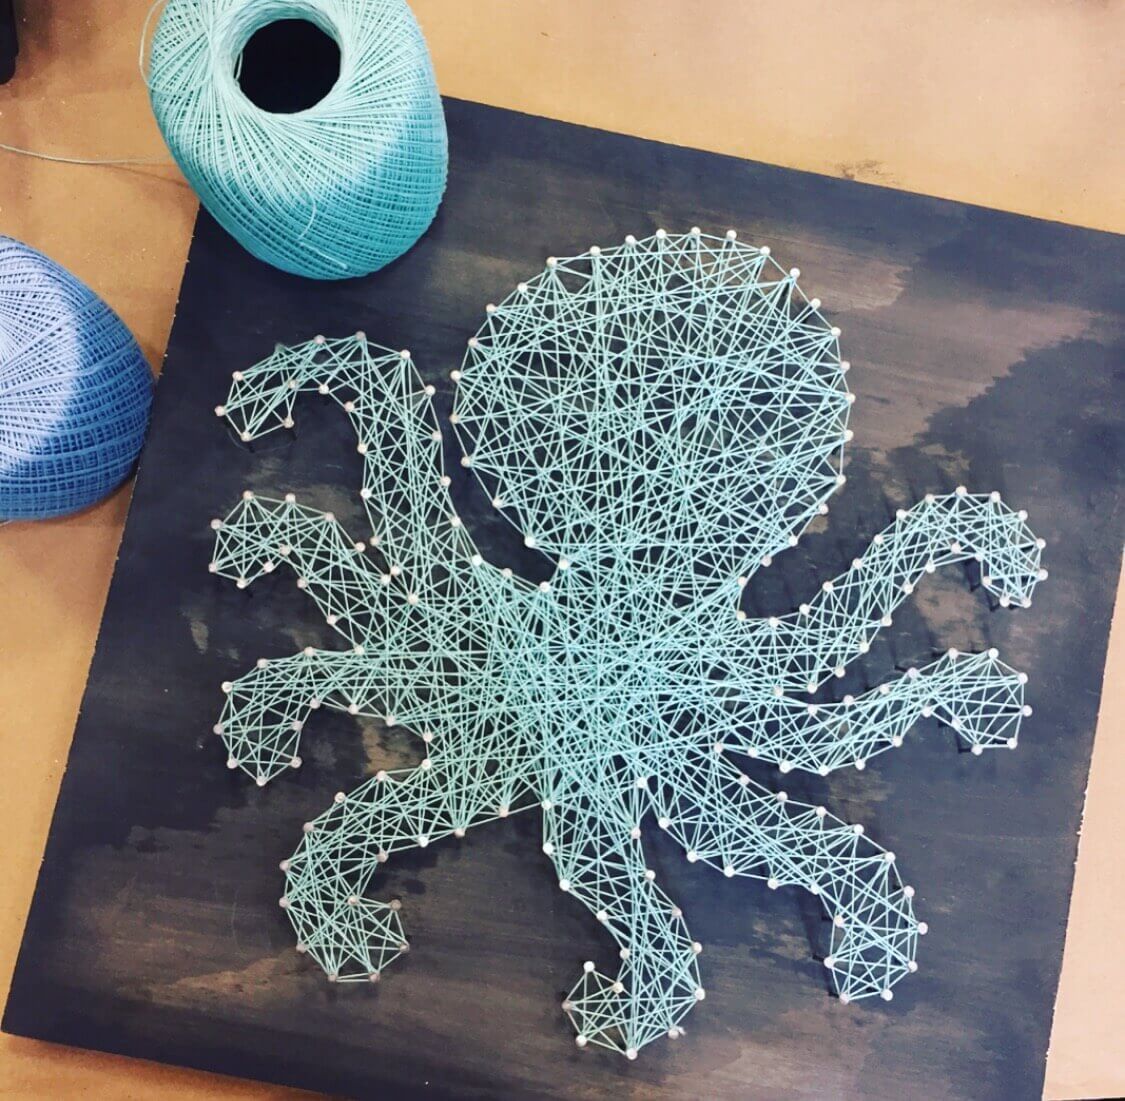 Tie up those loose ends with this perfect bedroom décor craft. String art is not only fun to make but is also an extremely customizable piece that can be tailored to any kid’s hobbies, interests, or style. You can also choose a shape based on your child’s skill level – simpler shapes are much easier! All you need is a square, wooden, 1-inch-thick board of your chosen size, colorful crotchet string, and 1-inch nails.
- Begin by painting, distressing, or staining your board, if desired. Make sure to do this prior to creating your string art design.
- Once your board is finished to your liking (and is completely dry if painted or stained), it is time to prepare your design. Lightly trace a shape with pencil onto the board (stencils work great!) to map out where you should place your nails.
- Hammer your nails into place, leaving 50% or more of the nail sticking out of the board to wrap string around several times. Remember to keep the nails relatively close to one another (about .5″ or a finger width apart) to ensure the design is apparent.
- Next, start wrapping! Take your desired string color and double-knot one end of it to any nail on the board. Begin to rope it around the outline of your pattern, remembering to circle the string around each nail it passes. Keep the string taunt as you wrap but don’t pull the string too tight as it will strain your nails and cause them to pop out.
- Once going around the entire outline, you may proceed to cross and twist the rope through the center of the pattern. Remember to loop the string around every nail you bring the string across to. Once your design is as filled with string as desired, finish it off by going around the outline one more time to lock in the other strings.
- Knot off the remaining string and trim the cut off the loose end.
String art looks great hung on a wall or sitting on a shelf!
2. Faux Aquarium
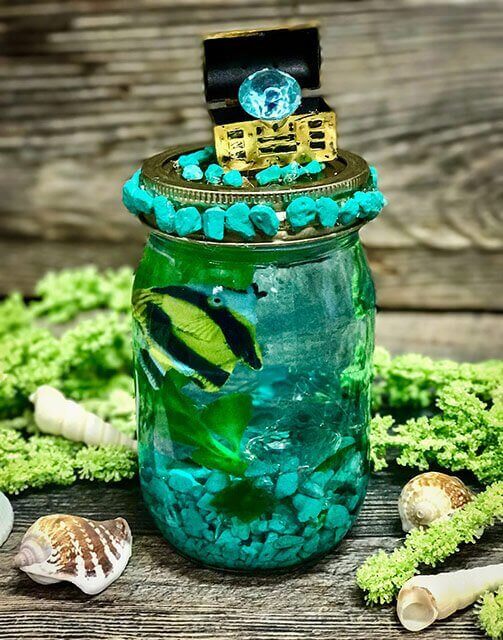 Although the fish in this aquarium may be fake, this children’s décor craft will certainly bring life to their space! This DIY is perfect for the kid who has always wanted a pet – but with this faux aquarium, there is no tank cleaning or fish care necessary! To create this décor piece, you will need an empty mason jar, plastic fish, pebbles, seashells, and plastic seaweed plant.
- Hot-glue (adult help required!) your plastic fish to your seaweed plant. Make sure to position your fish around halfway up the seaweed so that it looks like your fish is swimming in the water.
- Hot-glue your seaweed plant with the fish to the base of your mason jar. Let it dry completely before proceeding to the following steps.
- Once dry, fill the base of your aquarium with pebbles, stones, or seashells. Remember to not layer this foundation too high as you still want the majority of your seaweed plant to be visible.
- Fill up your mason jar with colored water, leaving a little room at the top. Feel free to add in some glitter to have your water sparkle and shine.
- To finish, screw back on the mason jar lid until completely sealed as you don’t want any of your aquarium water to leak out onto your furniture. Decorate the exterior and top of the aquarium with gravel, washi tape, gems, a treasure chest, etc.
This mini aquarium is the perfect decoration for your kid’s nightstand, desk, or any flat surface. This craft is available at Pinspiration Craft Studios.
3. Gumball Machine
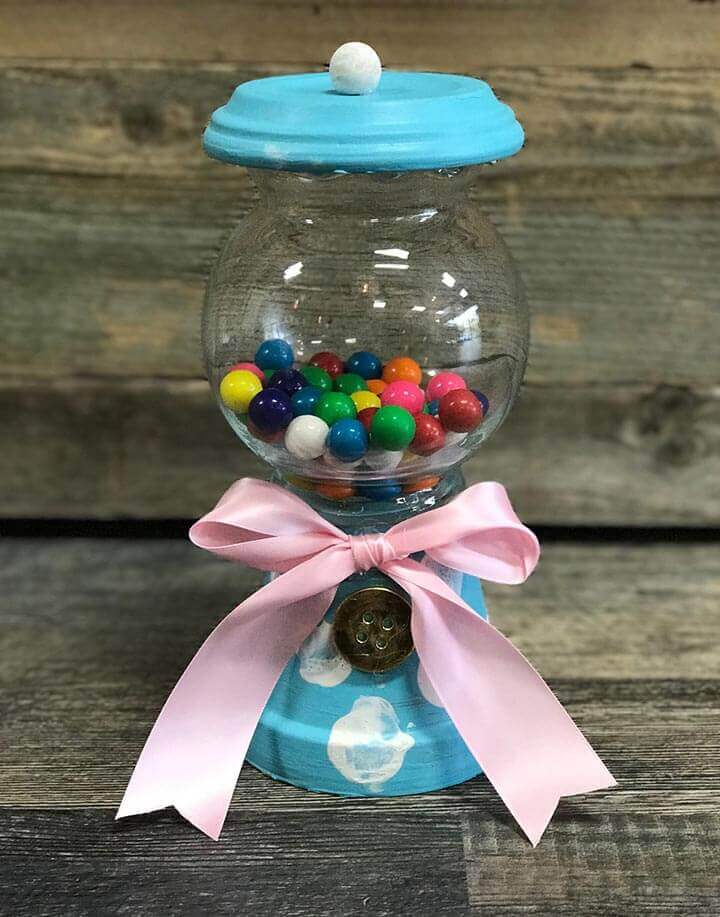 Who needs Candyland when you can have sweetness right at your fingertips? Add a dash of whimsy to your kid’s bedroom with this fun décor piece. Perfect for those with a sweet tooth, this adorable contraption is not only a great way to add a pop of color to your space but also brings in a touch of fun.
You will need a ceramic plant pot (base) and saucer (lid), wooden knob (for top of dispenser), wooden button (“dial”), and glass globe jar (the container), and E6000 glue. See image on right for how they go together – make sure the sizes align.
- To begin, customize the colors of the saucer lid, pot, wood knob, and button with your desired paint color. Paint the wood knob and flat dial in a contrasting color. Feel free to mix and match the base and lid color or add a design such as stripes or polka dots. You can even paint your gumball machine to match your bedroom theme or color scheme.
- Once the paint is completely dry, glue the wooden ball on top of the upside-down sauce to form a lid handle. Additionally, glue the flat dial to the front of your pot to create faux dial.
- Glue glass bowl to the upside down pot. Thoroughly cover the rim of the pot with E6000 glue to ensure that the pot will have a steady contact point with the glass.
- After all the glue is dried, it’s time to decorate! Add on embellishments such as decorative buttons, bows, or gems. Lastly, fill your machine with gumballs or your favorite candy. The lid is easily removable, so you can swap out or refill treats whenever necessary.
Keep on your child’s desk, bedside table, or anywhere you know they’ll want something sweet. This craft is available at Pinspiration Craft Studios.
4. Dreamcatcher
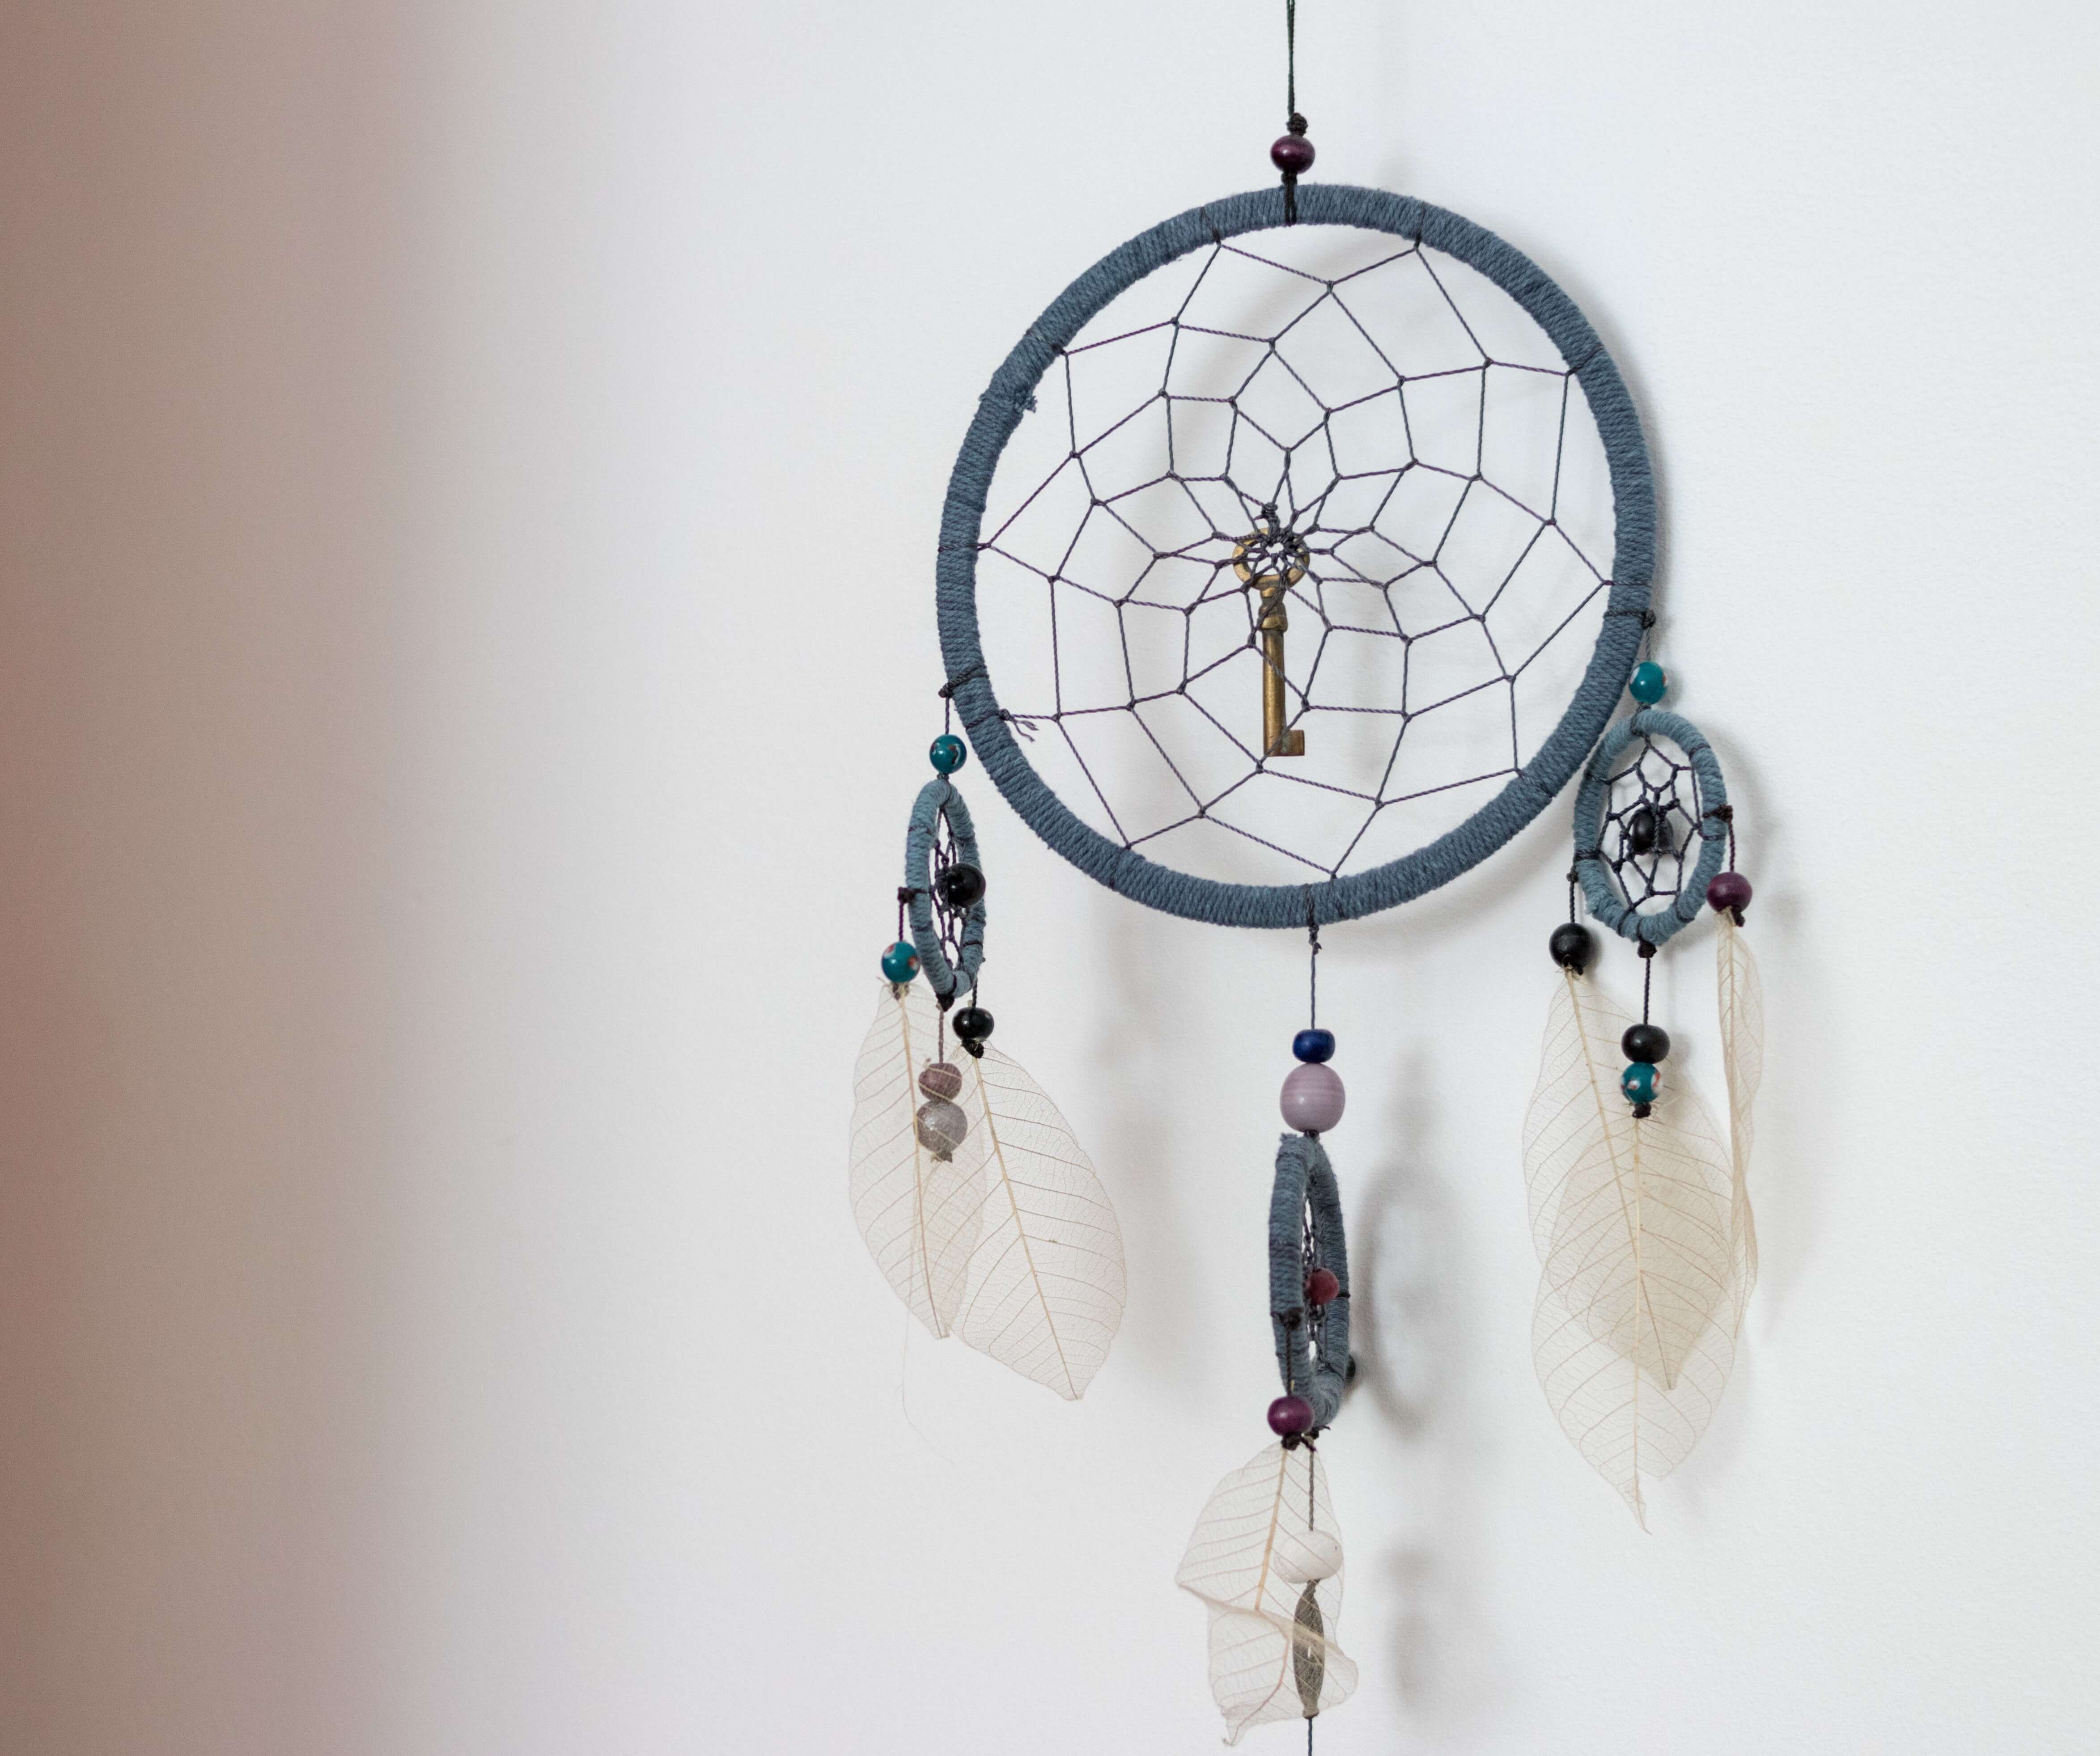 Perfect for the dreamer at heart, there is no greater reminder to your child to dream big than a dreamcatcher. A dreamcatcher serves as both a symbol of the imagination as well as a guardian to ward off evil spirits and energies.
You will need a large 20-inch plastic ring, string or jute, decorative ribbons, and beads, feathers, and dried leaves to hang from the base.
- Start off your dreamcatcher by wrapping your 20-inch ring with string. Make sure to keep the wrapping tight and close together to ensure that none of the ring is visible.
- Next, take one very long string and begin to cross the string across to the other sides of the loop. You can create as many or as few lines as you desire. Make sure to loop the string around the ring each time before crossing it over to a new location or else your string might slip off and ruin your design.
- After you are satisfied with your string design, tie off the remaining string at the base of your ring and cut off any excess. Don’t worry about the knot showing as you can always cover it with embellishments.
- To decorate, grab some more string or ribbons and tie along the base of the ring. You can keep them all the same length or vary it for a more traditional look. For both the string and the ribbons, you can coordinate the colors to match your child’s bedroom or favorite colors. Finish off by adding any beads, feathers, or other finishing touches.
This dreamcatcher craft is a beautiful décor piece to hang on or above your child’s bed. This craft is available at Pinspiration Craft Studios.
5. Vision Board
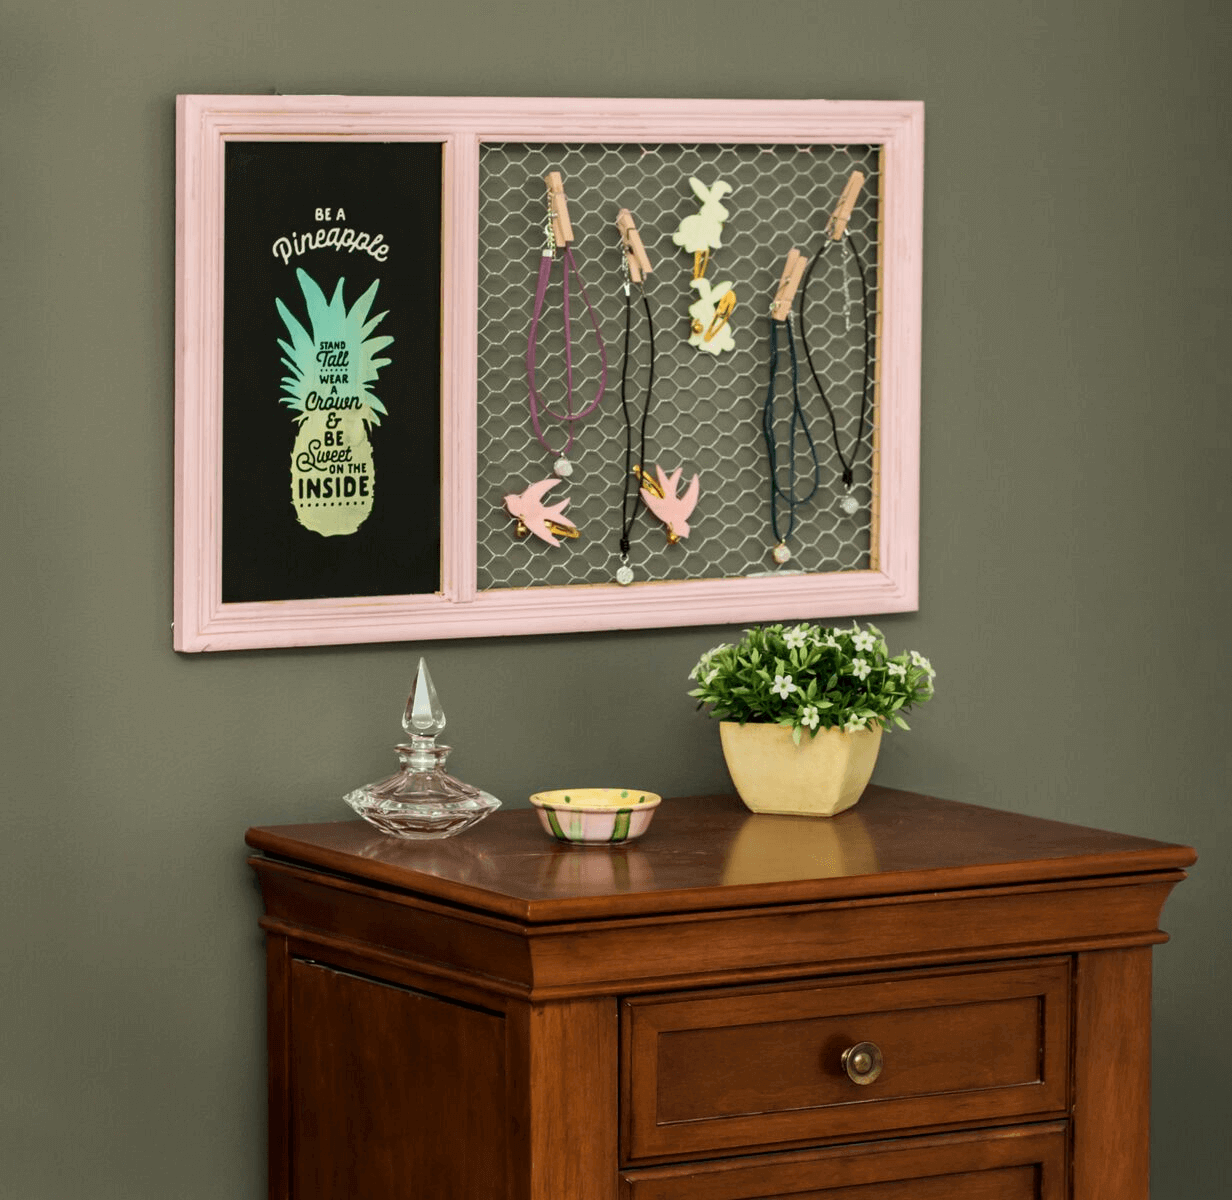 Help your child get organized with this cute yet functional bedroom décor piece. This craft also helps keep their space tidy as it is perfect to hang any jewelry, photographs, notes, etc. that are simply lying around your child’s bedroom.
You will need a wooden picture frame with two sections, chicken wire, blackboard paint, a thin wooden board, and colorful paint.
- Start off your vision board by painting your 13.75 x 22-inch frame using acrylic paint and a sponge brush. Paint the wood to your desired color such as your child’s favorite color or something to match the bedroom’s color scheme. You can also leave the frame unpainted for a more rustic vibe or keep it a simple white, black, or metallic color. If you’re worried about painting messily, feel free to tape off the wire and chalkboard sections to protect these surfaces from getting paint on them.
- Cut your wooden board to fit in the section of the frame you want to be your blackboard. Paint it with the blackboard paint.
- Let everything dry.
- Decorate the chalkboard and prepare your clothespins by painting or embellishing.
- Lastly, once everything is dry and ready, you can attach any photos, images, quotes, schedules, etc. to your vision board by clipping them onto the wire backing portion of the frame.
Hang above your child’s desk, nightstand, or somewhere it is constantly in view. This craft is available at Pinspiration Craft Studios.
Be sure to post your kid’s bedroom décor creations and tag Pinspiration on social media! We can’t wait to see your creative spin in making these DIY décor crafts come to life.